How to run Swift on EC2 with Terraform
In this post you’ll learn how to get an AWS EC2 instance provisioned and running Swift. I’ll be using an infrastructure-as-code (IAC) approach and a tool called Terraform. Terraform will allow you to orchestrate EC2 instances with one command in your terminal.
Instead of clicking around a web UI or SSHing to a server and manually executing commands, the idea behind IAC is to write code to define, provision, and manage your infrastructure. Yevgeniy Brikman
This isn’t an in depth explanation of Terraform. I’ll explain enough of the details so you can understand the script. If you want to take a deep dive I recommend reading the series “A Comprehensive Guide to Terraform”.
For the readers that know what I’m talking about and just want to skip to the Terraform scripts please see the GitHub repo. For everyone else who wants to learn how this is done please keep on reading.
Table of Contents
Things you’ll need to get started
AWS Account
If you don’t have one already signup for the free tier which is adequate for what we’ll be doing here.
Install Terraform
The simplest way to install Terraform on your Mac is with Homebrew.
brew install terraform
Clone GitHub Repo
Clone the GitHub repo for this blog post and initialize Terraform.
git clone git@github.com:kouky/swift-aws-ec2.git
cd swift-aws-ec2
terraform init
IAM User with EC2 Permission
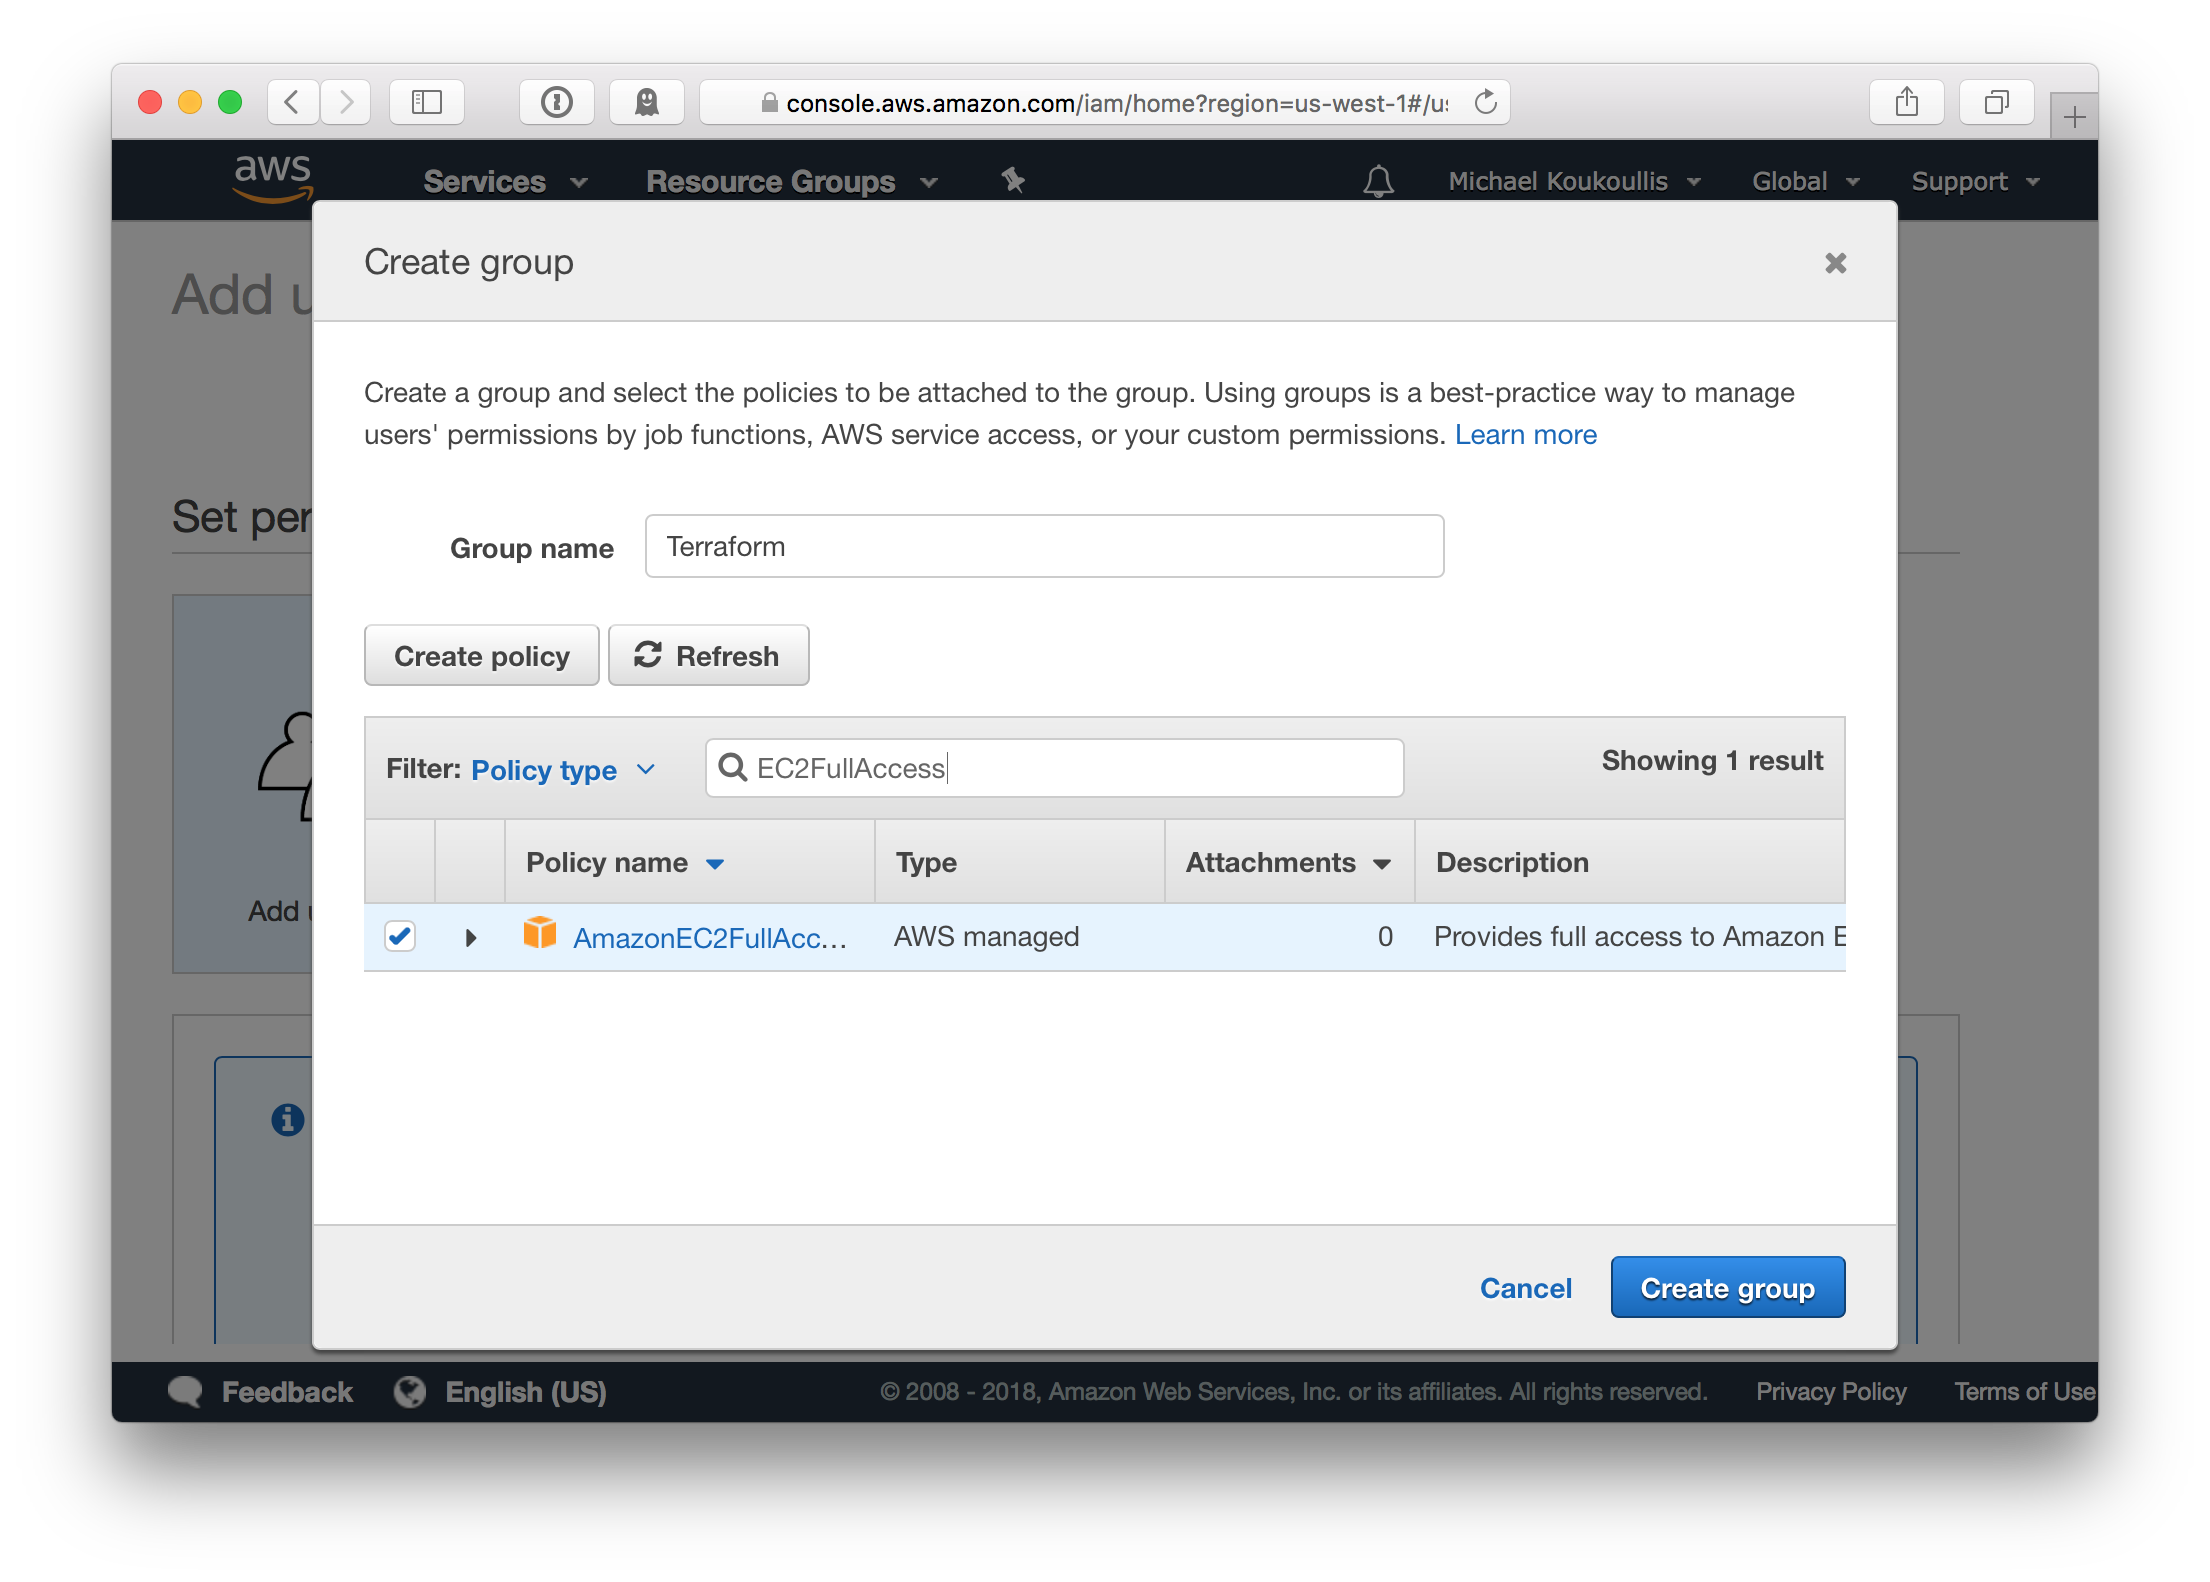
You’ll need an AWS user with access keys and the AmazonEC2FullAccess permission. From your AWS web console create a new user in the Identity and Access Management (IAM) service. You can choose any user name, in the screenshot my username is mike.

Add the user to a group named Terraform which has the AmazonEC2FullAccess permission assigned. The new user will be used to programmatically create, modify, and destroy resources in the EC2 service.
When the user is created store the access and secret access keys on your Mac in the file ~/.aws/credentials. Use a profile named terraform, this namespaces the keys for easier referencing in the Terraform script.
[terraform]
aws_access_key_id=ZKWADCXIEZFDOJYXWMU
aws_secret_access_key=xv5Ok0IzniIKkFjwzqROZZhGBrYVi+dzsLV/TNOV
Key Pair for EC2 Instances
From your AWS web console access the EC2 service and choose the region that matches the AWS provider in the Terraform script. We’ll be using us-west-1 which corresponds with US West N. California. Name the key pair swift-server which is what I specified for key_name in the Terraform script.
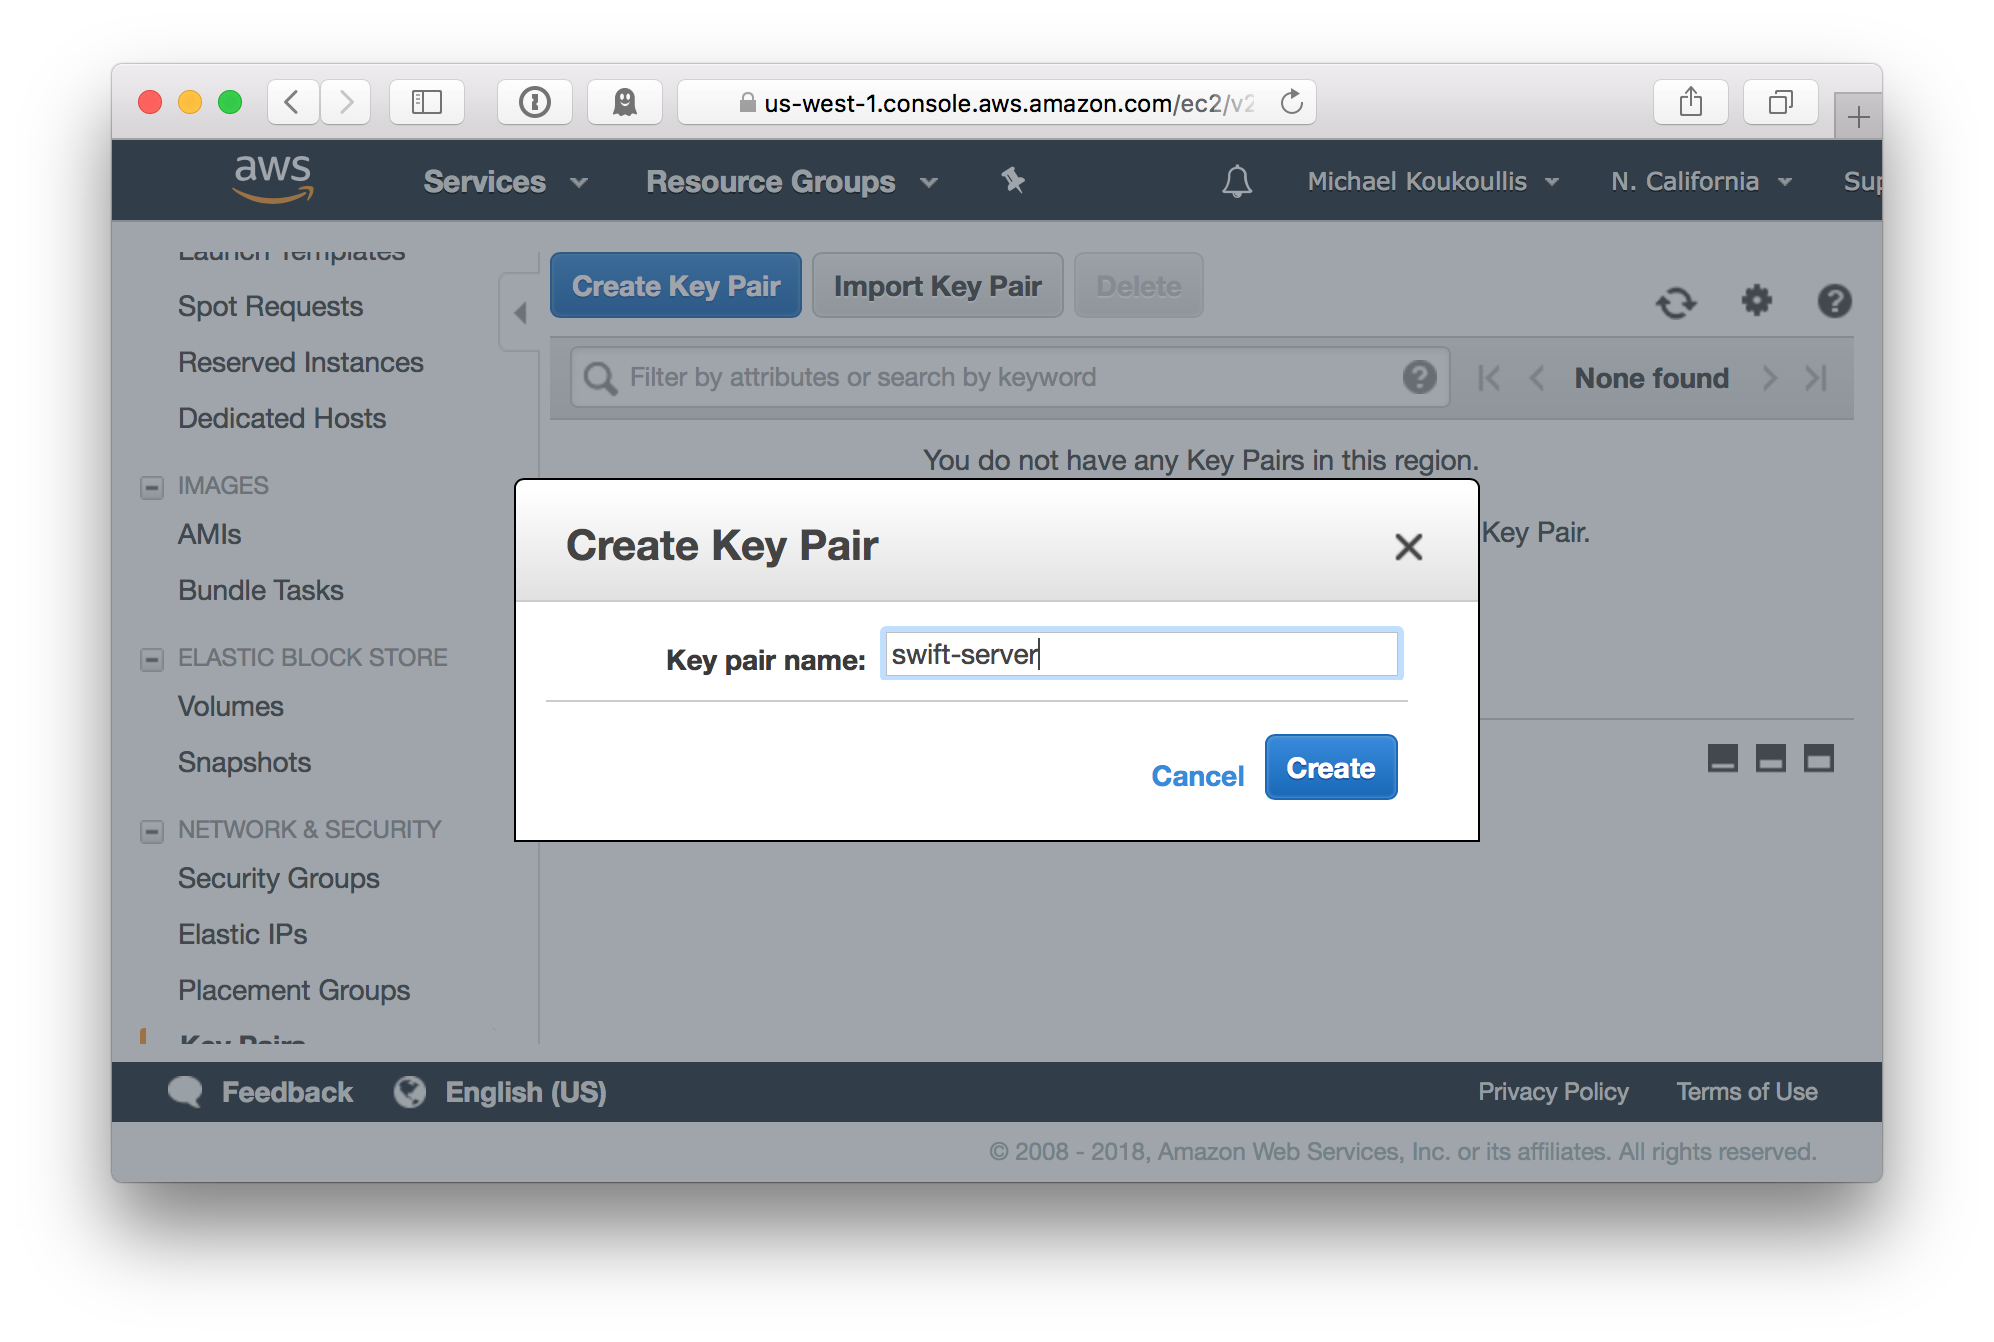
After creating the key pair your browser will download the private key to a file named swift-server.pem.txt. Store it somewhere convenient as you’ll need it to SSH into the EC2 instance.
Understanding the Terraform Script
Terraform scripts are written in a configuration language called HCL that is both human and machine readable. The script we’ll be running is named main.tf in the GitHub repo, I’ll explain the various sections briefly.
/* main.tf */

provider "aws" {
  region = "us-west-1"
  profile = "terraform"
  version = "~> 1.9"
}

resource "aws_instance" "swift-server" {
  ami = "ami-9cb2bdfc"
  instance_type = "t2.micro"
  vpc_security_group_ids = ["${aws_security_group.swift-server.id}"]
  key_name = "swift-server"
  tags {
    Name = "Swift Server"
  }
  user_data = "${file("user-data.sh")}"
}

resource "aws_security_group" "swift-server" {
  name = "swift-server"

  ingress {
    from_port = 22
    to_port = 22
    protocol = "tcp"
    cidr_blocks = ["0.0.0.0/0"]
  }

  egress {
    from_port = 0
    to_port = 0
    protocol = "-1"
    cidr_blocks = ["0.0.0.0/0"]
  }
}

output "public_ip" {
  value = "${aws_instance.swift-server.public_ip}"
}
AWS Provider
The first entry in the Terraform script specifies that we want to use the AWS provider. Credentials can be made available to the provider in several ways. I’ve chosen to store keys in the default ~/.aws/credentials file and to namespace them with a profile named terraform.
/* See https://www.terraform.io/docs/providers/aws/ */
provider "aws" {
  region = "us-west-1"
  profile = "terraform"
  version = "~> 1.9"
}
EC2 Instance Resource
The aws_instance resource specifies the properties of the AWS EC2 instance. The key ami specifies the machine image which I chose from an official Ubuntu list.
/* See https://www.terraform.io/docs/providers/aws/r/instance.html */
resource "aws_instance" "swift-server" {
  ami = "ami-9cb2bdfc" /* Ubuntu 16.04 LTS https://cloud-images.ubuntu.com/locator/ec2/ */
  instance_type = "t2.micro" /* See https://aws.amazon.com/ec2/instance-types/ */
  vpc_security_group_ids = ["${aws_security_group.swift-server.id}"]
  key_name = "swift-server"
  tags {
    Name = "Swift Server"
  }
  user_data = "${file("user-data.sh")}"
}
The script user-data.sh will execute when the instance is booting. It updates the server with apt-get and downloads the prebuilt Swift binary for Ubuntu. It can take around a minute for the script to complete so an alternate faster approach would be to let the instance boot once and then create a custom Amazon Machine Image for future use.
Security Group Resource
By default, AWS EC2 instances don’t allow any inbound traffic. The aws_security_group resource can be used to define what traffic is allowed. We allow incoming tcp traffic on the default SSH port 22. The egress rules allow the server to initiate an outgoing connection which is necessary for user data script user-data.sh to update packages and download Swift binaries.
/* See https://www.terraform.io/docs/providers/aws/r/security_group.html */
resource "aws_security_group" "swift-server" {
  name = "swift-server"

  ingress {
    from_port = 22
    to_port = 22
    protocol = "tcp"
    cidr_blocks = ["0.0.0.0/0"]
  }

  egress {
    from_port = 0
    to_port = 0
    protocol = "-1"
    cidr_blocks = ["0.0.0.0/0"]
  }
}
The prior aws_instance resource attaches this security group via the key vpc_security_group_ids.
Output Variables
Once the Terraform script has completed running we can display the public IP address of the EC2 instance by using an output variable.
/* See https://www.terraform.io/intro/getting-started/outputs.html */
output "public_ip" {
  value = "${aws_instance.swift-server.public_ip}"
}
Running Terraform
If you haven’t done so already, run terraform init from the root directory of the GitHub repo you cloned earlier.
terraform init
Plan command
The terraform plan command lets you see what Terraform will do before actually making changes to resources on AWS. You should see something like the following:
➜  swift-aws-ec2 git:(master) terraform plan
Refreshing Terraform state in-memory prior to plan...
The refreshed state will be used to calculate this plan, but will not be
persisted to local or remote state storage.

------------------------------------------------------------------------

An execution plan has been generated and is shown below.
Resource actions are indicated with the following symbols:
  + create

Terraform will perform the following actions:

  + aws_instance.swift-server
      id:                                    <computed>
      ami:                                   "ami-9cb2bdfc"
      associate_public_ip_address:           <computed>
      availability_zone:                     <computed>
      ebs_block_device.#:                    <computed>
      ephemeral_block_device.#:              <computed>
      instance_state:                        <computed>
      instance_type:                         "t2.micro"
      ipv6_address_count:                    <computed>
      ipv6_addresses.#:                      <computed>
      key_name:                              "swift-server"
...
Apply command
To create the EC2 instance run the terraform apply command. When the script has completed you’ll see the IP address for the new instance.
➜  swift-aws-ec2 git:(master) terraform apply

...
aws_instance.swift-server: Still creating... (10s elapsed)
aws_instance.swift-server: Still creating... (20s elapsed)
aws_instance.swift-server: Still creating... (30s elapsed)
aws_instance.swift-server: Still creating... (40s elapsed)
aws_instance.swift-server: Creation complete after 49s (ID: i-0aa2435878a7749ad)

Apply complete! Resources: 2 added, 0 changed, 0 destroyed.

Outputs:

public_ip = 54.219.167.28
Use the IP address to SSH into your machine with the .pem file you created earlier.
ssh -i ~/swift-server.pem.txt ubuntu@54.219.167.28
You should now be logged into your instance. The user data script user-data.sh which downloads and installs Swift may still be running. You can see the progress of the script by tailing the cloud log.
ubuntu@ip-54-219-167-28:~$ tail -f /var/log/cloud-init-output.log

swift-4.0.3-RELEASE-ubuntu16.04/usr/include/lldb/API/SBAttachInfo.h
swift-4.0.3-RELEASE-ubuntu16.04/usr/include/lldb/API/SBCommunication.h
swift-4.0.3-RELEASE-ubuntu16.04/usr/include/lldb/API/SBInstructionList.h
swift-4.0.3-RELEASE-ubuntu16.04/usr/include/lldb/API/SBTypeNameSpecifier.h
swift-4.0.3-RELEASE-ubuntu16.04/usr/include/lldb/API/SBValue.h
swift-4.0.3-RELEASE-ubuntu16.04/usr/include/lldb/API/SBWatchpoint.h
swift-4.0.3-RELEASE-ubuntu16.04/usr/include/lldb/API/LLDB.h
swift-4.0.3-RELEASE-ubuntu16.04/usr/include/lldb/API/SBInstruction.h
Cloud-init v. 17.1 running 'modules:final' at Sun, 25 Feb 2018 05:54:37 +0000. Up 12.03 seconds.
Cloud-init v. 17.1 finished at Sun, 25 Feb 2018 05:56:08 +0000. Datasource DataSourceEc2Local.  Up 103.65 seconds
Once the user data script has completed running you’re ready to use Swift! Invoke the REPL at the command line with swift.
ubuntu@ip-54-219-167-28:~$ swift

Welcome to Swift version 4.0.3 (swift-4.0.3-RELEASE). Type :help for assistance.
  1> let x = "Hello World"
x: String = "Hello World"
  2> x
$R0: String = "Hello World"
Destroy command
When you’re done experimenting remember to stop the running instance and destroy all the associated AWS resources by running the terraform destroy command.
➜  swift-aws-ec2 git:(master) terraform destroy
...

aws_instance.swift-server: Destroying... (ID: i-0aa2435878a7749ad)
aws_instance.swift-server: Still destroying... (ID: i-0aa2435878a7749ad, 10s elapsed)
aws_instance.swift-server: Still destroying... (ID: i-0aa2435878a7749ad, 20s elapsed)
aws_instance.swift-server: Still destroying... (ID: i-0aa2435878a7749ad, 30s elapsed)
aws_instance.swift-server: Destruction complete after 36s
aws_security_group.swift-server: Destroying... (ID: sg-91d6b7e8)
aws_security_group.swift-server: Destruction complete after 2s

Destroy complete! Resources: 2 destroyed.
So that’s it, I hope you’ve learnt something new. If you have any questions raise an issue on the GitHub repo or contact me directly.