Primary Flight Display Framework for Mac + iOS
PrimaryFlightDisplay is a Mac + iOS framework for use in ground control station and telemetry systems for micro UAVs (unmanned aerial vehicles).
The framework enables convenient embedding and animation of a primary flight display. Styles and colors are easily tuned whilst maintaining crisp graphics for any screen resolution.
A demo Xcode project for MAVLink speaking autopilots is available from my GitHub.
Key features include:
- Artificial horizon
- Pitch ladder
- Bank indicator
- Heading tape indicator
- Airspeed / Groundspeed tape indicator
- Altitude tape indicator
- Crisp procedurally generated graphics
- Highly configurable colors, sizes, and tape indicator scales
- No library dependenices other than Apple’s SpriteKit
- Flight stack and protocol agnostic
How to add a Primary Flight Display
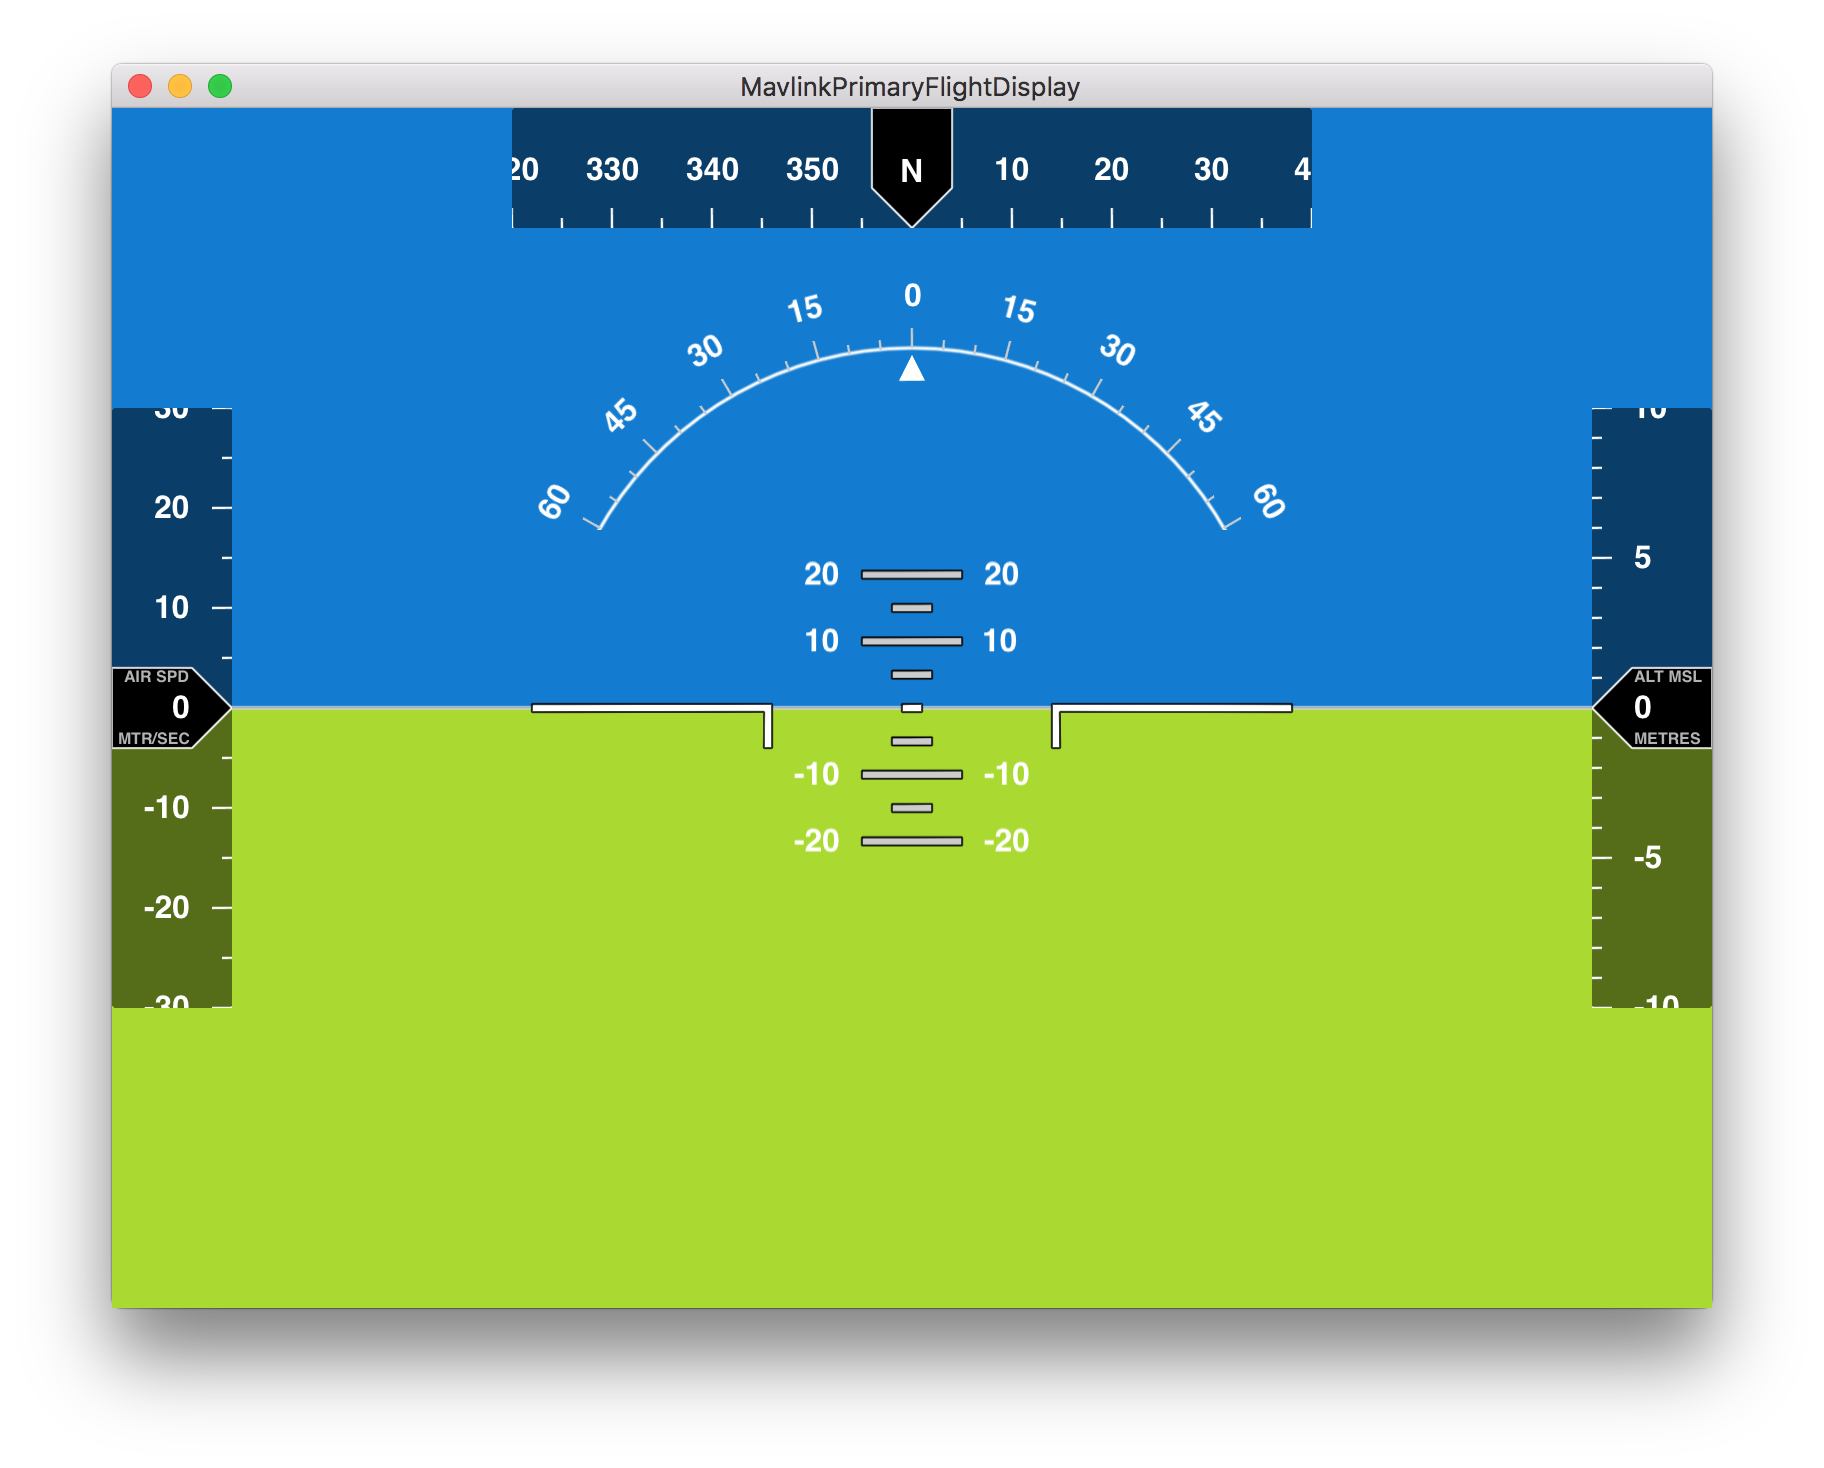
Construct a new PrimaryFlightDisplayView with default styles, and add it to your view hierarchy.
let flightView = PrimaryFlightDisplayView(frame: frame)
flightView.autoresizingMask = [.ViewHeightSizable, .ViewWidthSizable]
addSubview(flightView)
Send flight data to the primary flight display using the following API methods. The new flight data values will be animated immediately, and you’re done!
flightView.setAttitude(rollRadians: 1.0, pitchRadians: 1.5)
flightView.setHeadingDegree(300)
flightView.setAirSpeed(20)
flightView.setAltitude(165)
Customizing Styles
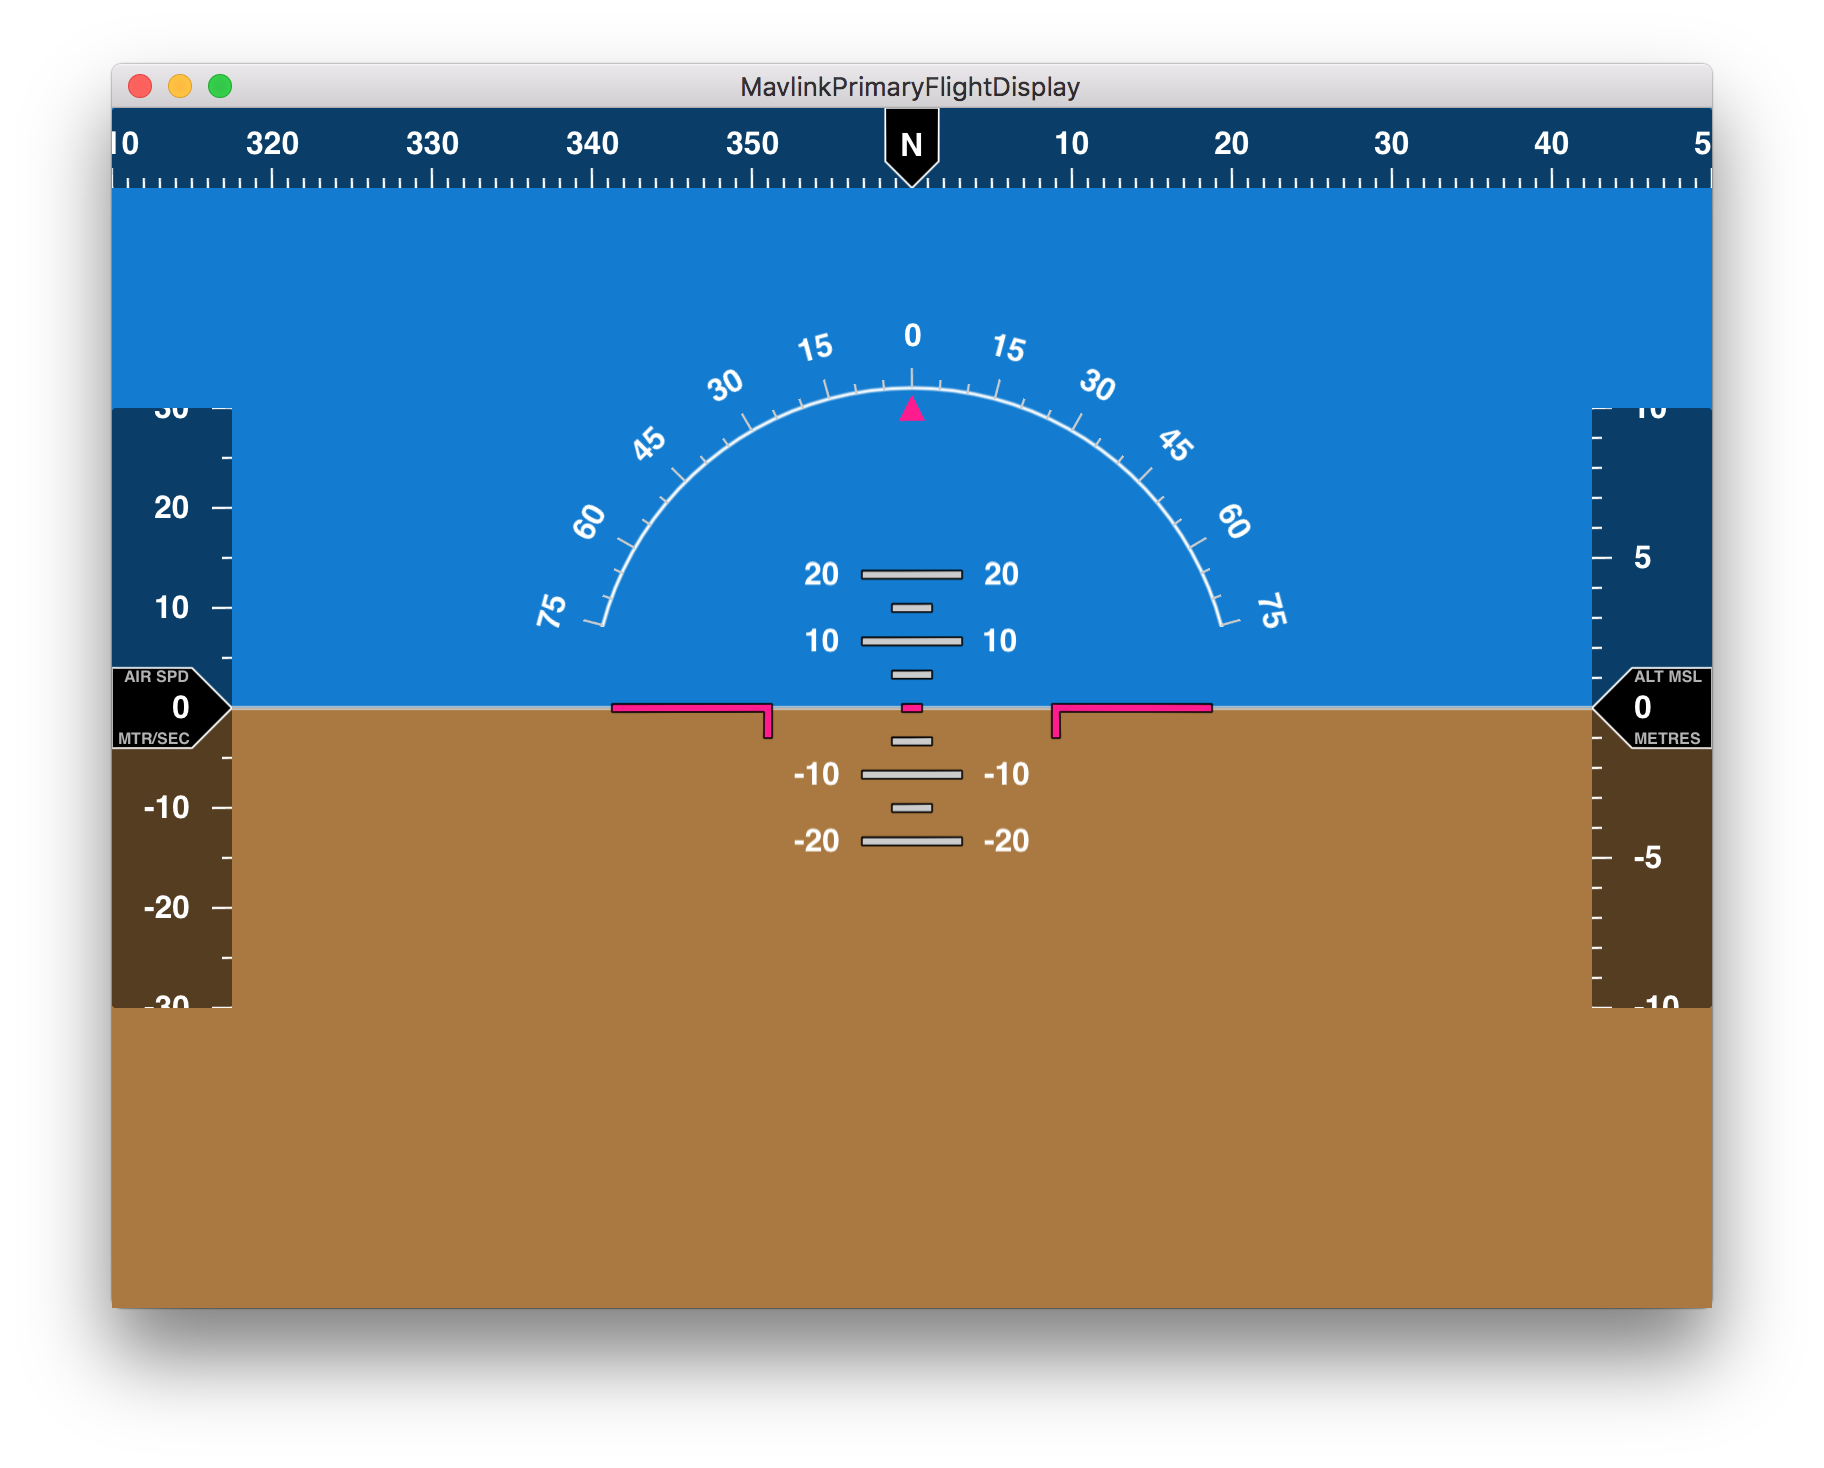
The styles for the default primary flight display are easily tuned, see Settings.swift for all the tuneable styles. As an exercise, let’s set the styles to create the primary flight display in the screenshot below.
Start with the default settings.
var settings = DefaultSettings()Change the ground color to brown.
settings.horizon.groundColor = SKColor.brownColor()Change the sky pointer color to pink, increase the bank indicator arc maximum degree to 75 and reduce the arc radius slightly to 160 points.
let pinkColor = SKColor(red:1.00, green:0.11, blue:0.56, alpha:1.0)
settings.bankIndicator.skyPointerFillColor = pinkColor
settings.bankIndicator.arcMaximumDisplayDegree = 75
settings.bankIndicator.arcRadius = 160
Set the attitude reference index to pink and reduce its size slightly so it fits within the smaller bank indicator radius.
settings.attitudeReferenceIndex.fillColor = pinkColor
settings.attitudeReferenceIndex.sideBarWidth = 80
settings.attitudeReferenceIndex.sideBarHeight = 15
Make the heading indicator wider and slimmer, display a minor marker every degree and a major marker every 10 degrees. Increase the points (virtual pixels ) per unit value to 8, which means the numbers on the tape indicator are more spread out.
settings.headingIndicator.size.width = 800
settings.headingIndicator.size.height = 40
settings.headingIndicator.minorMarkerFrequency = 1
settings.headingIndicator.majorMarkerFrequency = 10
settings.headingIndicator.pointsPerUnitValue = 8
settings.headingIndicator.markerTextOffset = 15
Construct a new primary flight display view with the custom settings, and add it to your view hierarchy.
let flightView = PrimaryFlightDisplayView(frame: frame, settings: settings)
flightView.autoresizingMask = [.ViewHeightSizable, .ViewWidthSizable]
addSubview(flightView)
Demonstration App
MavlinkPrimaryFlightDisplay is a Mac app which demonstrates how to integrate the PrimaryFlightDisplay framework for a MAVLink speaking autopilot. Clone the repo and follow the README to get the app running and connect to your autopilot.
The demo app is useful as a learning tool in several other ways as it demonstrates how to: